Connect Power Bi to the Zerynth Device Manager
Power BI is a business analytics service by Microsoft that allows building interactive visualizations and business intelligence analysis with a drag and drop interface.
Power BI provides cloud-based BI (business intelligence) services, known as “Power BI Services”, along with a desktop-based interface, called “Power BI Desktop”.
In this tutorial, the Power Bi Desktop is used to build a dashboard that connects to the Zerynth Device Manager API retrieving the last month of data of a workspace.
To start with this tutorial you need:
- A Zerynth Device Manager account with an active workspace where at least one device has been created,
- A Zerynth device running the simple ZDM example (see the ZDM getting started for how to program and connect a device to the ZDM) or a PC/Raspberry Pi running the ZDM Client Python lib example (see the dedicated how-to guide here,
- Power Bi desktop installed on your computer (download from here,
- The ready to use .pbx file you can download from here,
- Copy and paste skills. 🙂
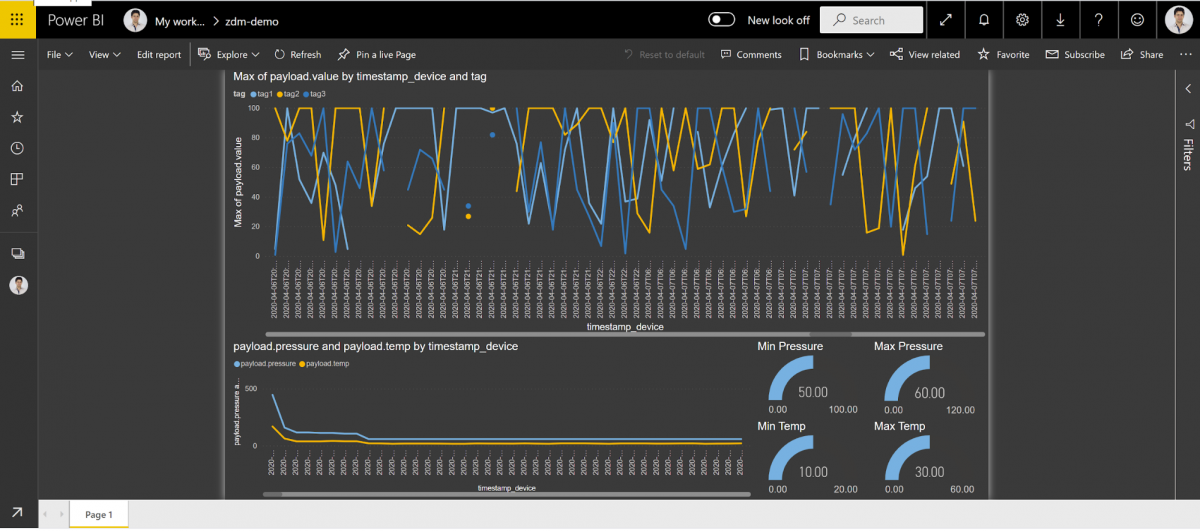
The .pbx file you downloaded is a Power Bi Desktop project with a ready to use demo dashboard that connects to the ZDM via API, retrieving the last month of data available in a specific workspace.
In Power Bi, data sources are customizable using the Microsoft m query language. In the demo project, we prepared a custom query that calls the ZDM API. This query needs to be updated with the ID of the workspace you want to use as a data source and with your Zerynth authorization token.
To retrieve the ZDM workspace ID, open the ZDM web interface at https://zdm.zerynth.com/ click on the workspace you want to use, and copy the Workspace ID from the blue box located in the top-left area of the interface.
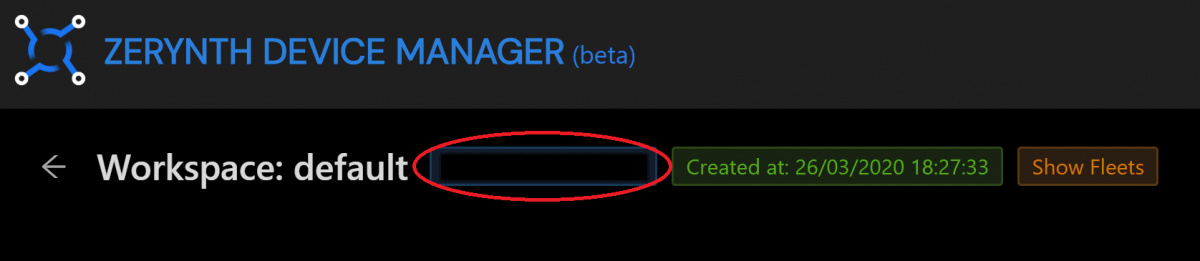
This needs to be saved somewhere, we’ll use it later.
Now, the user needs the Zerynth authorization token for the API. The next step is to open https://backend.zerynth.com/v1/sso, login if requested, and copy the token.
Now the query can be edited by opening the Power Bi project, clicking on the Transform Data button in the Home menu ribbon and then clicking on Advanced Editor to open the m query language editor.
Finally, the user can replace the workspace ID and the Token with his, as reported in the following code example:
let
    Query1 = let
Source = Json.Document(Web.Contents("https://api.zdm.zerynth.com/v1/tsmanager/workspace/REPLACE-WITH-YOUR-WORKSPACE-ID?sort=-timestamp_device&size=-1&start=" & DateTime.ToText(Date.AddMonths(DateTime.LocalNow(), -1), "yyyy-MM-ddT00:00:00Z") &"&end=" & DateTime.ToText(DateTime.LocalNow(), "yyyy-MM-ddThh:mm:ssZ"), [Headers=[Authorization="Bearer REPLACE-WITH-YOUR-VERY-LONG-TOKEN"]])),
    myTable = Record.ToTable(Source),
    myTableRec = Table.ExpandListColumn(myTable, "Value")
in
    Table.ExpandRecordColumn(myTableRec, "Value", { "tag", "timestamp_device", "device_id", "payload" }),
    #"Expanded payload" = Table.ExpandRecordColumn(Query1, "payload", {"temp", "pressure", "value"}, {"payload.temp", "payload.pressure", "payload.value"}),
    #"Filtered Rows" = Table.SelectRows(#"Expanded payload", each true)
in
    #"Filtered Rows"
The user can then click Done and wait for the data table to update. If everything goes fine, they will see your last month of data published by your devices on the selected workspace in the table. Then the user can click on Close&Apply and see the dashboard updated with their data!
That’s all! The user can play with Power Bi by extending their dashboard as they wish.
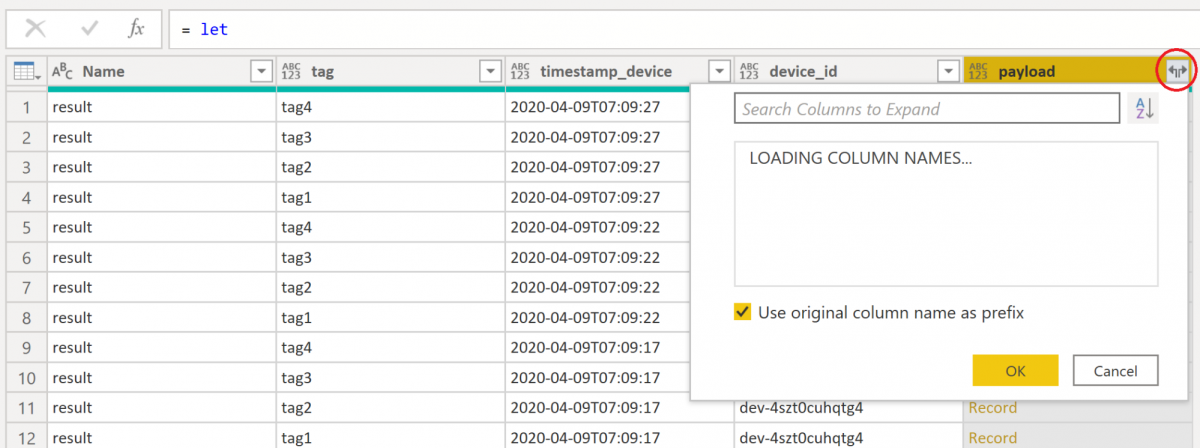
If the user wants to change the firmware of their devices, thus modifying the Tag and Value names, they can use the following basic query where the payload is not split in different column tables directly in the query. They will do the splitting using the wizard provided by Power Bi in the Query Editor.
let
Source = Json.Document(Web.Contents("https://api.zdm.zerynth.com/v1/tsmanager/workspace/REPLACE-WITH-YOUR-WORKSPACE-ID-HERE?sort=-timestamp_device&size=-1&start=" & DateTime.ToText(Date.AddMonths(DateTime.LocalNow(), -1), "yyyy-MM-ddT00:00:00Z") &"&end=" & DateTime.ToText(DateTime.LocalNow(), "yyyy-MM-ddThh:mm:ssZ"), [Headers=[Authorization="Bearer REPLACE-WITH-YOUR-SUPER-LONG-TOKEN-HERE"]])),
    myTable = Record.ToTable(Source),
    myTableRec = Table.ExpandListColumn(myTable, "Value")
in
    Table.ExpandRecordColumn(myTableRec, "Value", { "tag", "timestamp_device", "device_id", "payload" })
Now the user can publish their Dashboard online if they want!