Particle Photon
The Particle Photon is a complete Wi-Fi enabled development platform for creating connected devices with ease, the successor of the Particle Core.
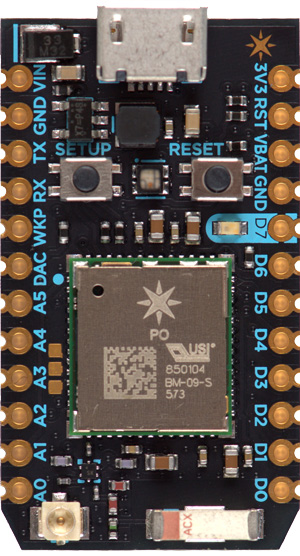
Particle Photon combines a powerful ARM Cortex M3 micro-controller with a Broadcom Wi-Fi chip in a tiny thumbnail-sized module called the PØ (P-zero). Particle Photon uses the STM32F205RG Cortex M3 microcontroller.
In addition to having 1Mb of internal flash memory for storing the firmware, the Photon also features 128k of Ram and 120 MHz of clock.
Note
All the reported information are extracted from the official Particle Photon reference page, visit this page for more details and updates.
Pin Mapping
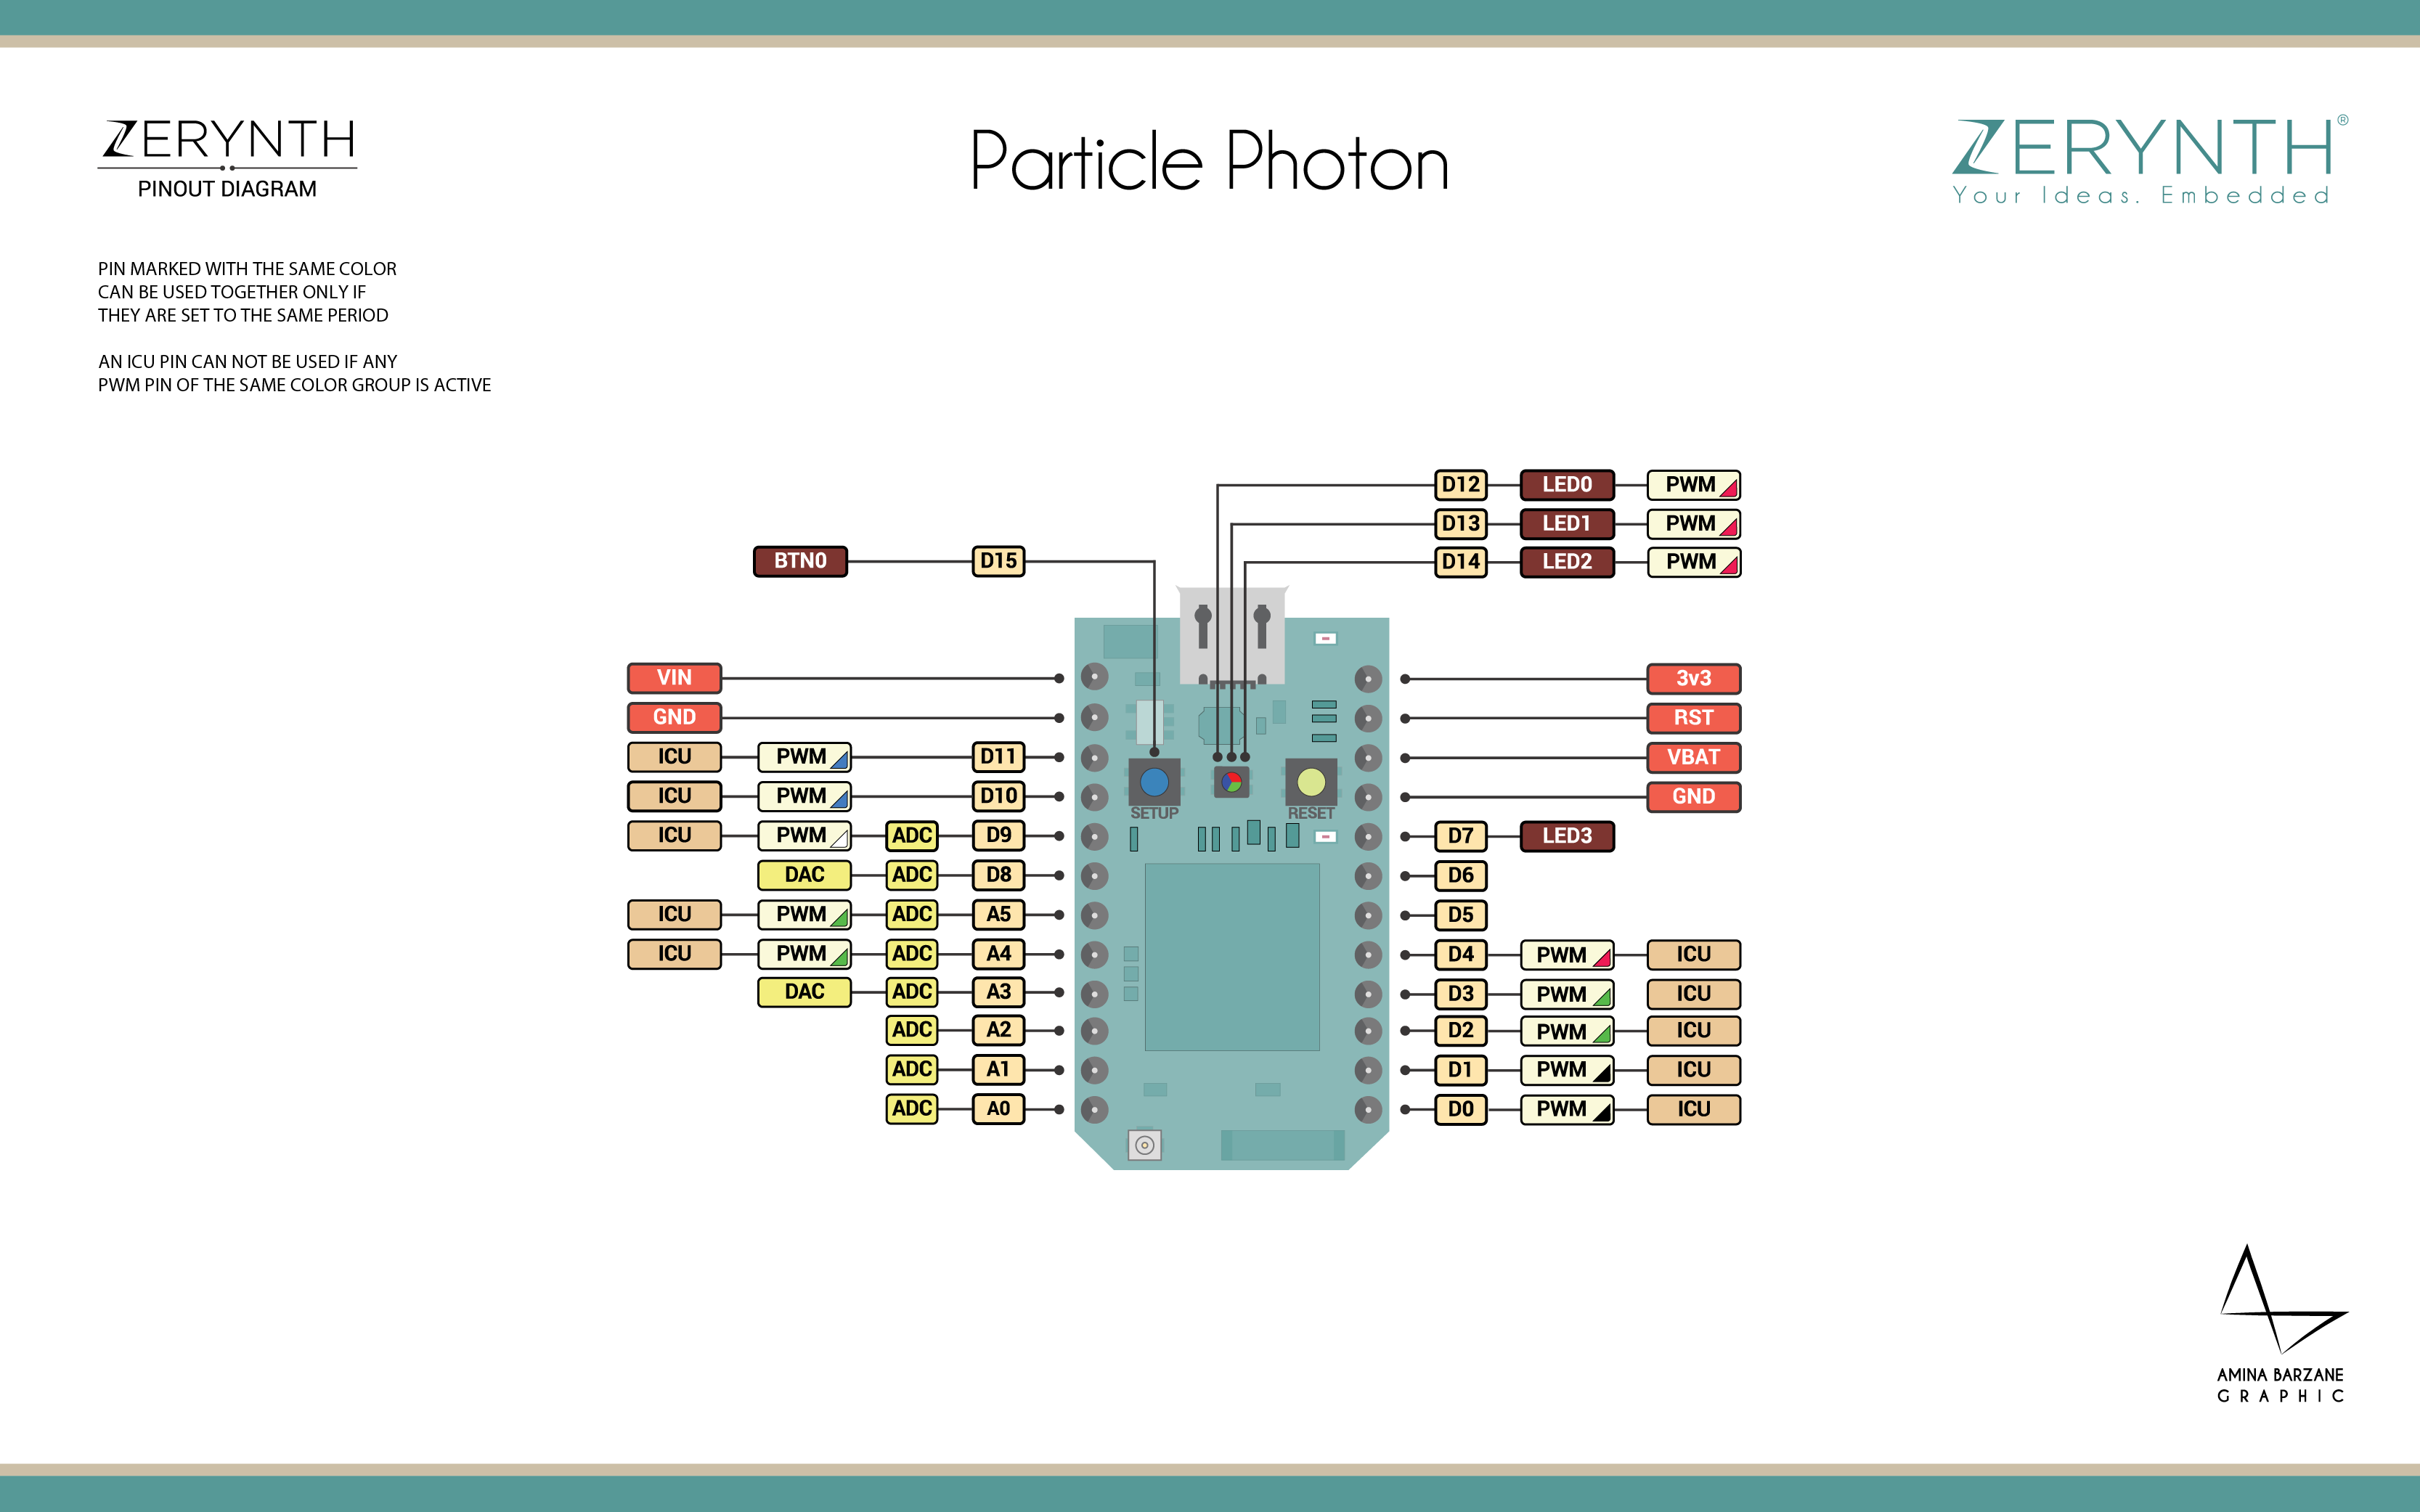
Particle Photon Official Schematic, Reference Design & Pin Mapping are available on the official Particle Photon datasheet page.
Flash Layout
The internal flash of the Particle Photon is organized into sectors of different size according to the following table:
| Start address | Size | Content |
|---|---|---|
| 0x8000000 | 16Kb | BootLoader |
| 0x8004000 | 16Kb | DCT1 |
| 0x8008000 | 16Kb | DCT2 |
| 0x800C000 | 16Kb | EEPROM1 |
| 0x8010000 | 64Kb | EEPROM2 |
| 0x8020000 | 128kb | Virtual Machine |
| 0x8040000 | 128kb | Bytecode Bank 0 |
| 0x8060000 | 128kb | Bytecode Bank 1 |
| 0x8080000 | 128kb | Bytecode Bank 2 |
| 0x80A0000 | 128kb | Bytecode Bank 3 |
| 0x80C0000 | 128kb | Bytecode Bank 4 |
| 0x80E0000 | 128kb | Bytecode Bank 5 |
Important
To avoid deleting the Photon configuration it is recommended not to write in sectors between 0x8004000 and 0x8020000.
Warning
If internal flash is used in a Zerynth program, it is recommended to start from pages at the end of flash (bytecode bank 5) towards the virtual machine, to minimize the chance of clashes. Since writing to a sector entails erasing it first, the write operation can be slow even for small chunks of data, depending on the size of the chosen sector.
Device Summary
- Microcontroller: ARM 32-bit Cortex™-M3 CPU Core
- Operating Voltage: 3.3V
- Input Voltage: 3.6-6V
- Digital I/O Pins (DIO): 18
- Analog Input Pins (ADC): 5
- Analog Outputs Pins (DAC): 1
- UARTs: 1
- SPIs: 2
- I2Cs: 1
- CANs: 1
- Flash Memory: 1Mb
- SRAM: 128 KB
- Clock Speed: 120Mhz
- Size (LxW mm): 36.58 X 20.32
Power
Power to the Particle Photon device is supplied via the on-board USB micro B connector or directly via the VIN pin:
- If power is supplied directly to the VIN pin, the voltage should be regulated between 3.6VDC and 5.5VDC.
- If the device is powered via the USB port, VIN will output a voltage of approximately 4.8VDC due to a reverse polarity protection series schottky diode between V+ of USB and VIN.
Note
When used as an output, the max load current on VIN is 1 Ampere.
Typical current consumption is 80mA with a 5V input. Deep sleep quiescent current is 160uA. When powering the Photon from the USB connector, make sure to use a quality cable to minimize voltage drops. If a high resistance cable (i.e., low current) is used, peak currents drawn from the Photon when transmitting and receiving will result in voltage sag at the input which may cause a system brown out or intermittent operation. Likewise, the power source should be sufficient enough to source 1A of current to be on the safe side.
Connect, Register, Virtualize and Program
On Windows machines the Particle Photon USB Drivers are required by Zerynth Studio for accessing the serial port establishing a connection with the STM32 UART.
To install the drivers on Windows plug the Photon on an USB port, unzip the downloaded package, go to the Window Devices Manager and double-click on the Particle device under “Other Devices”. Click Update Driver, and select Browse for driver software on your computer. Navigate to the folder where the package has been unzipped and select it (Note that right now, the drivers are in a Spark folder and are named photon.cat).
Note
It could be necessary to temporarily disable the digitally signed driver enforcement policy of Windows to allow Photon driver installation. There are good instructions on how to do that in this guide.
On MAC OSX and Linux platforms USB drivers are not required.
Note
For Linux Platform: to allow the access to serial ports the user needs read/write access to the serial device file. Adding the user to the group, that owns this file, gives the required read/write access: Ubuntu distribution –> dialout group; Arch Linux distribution –> uucp group.
If the device is still not recognized or not working, the following udev rules may need to be added:
#Particle Photon
SUBSYSTEMS=="usb", ATTRS{idVendor}=="2b04", ATTRS{idProduct}=="d006", MODE="0666", GROUP="users", ENV{ID_MM_DEVICE_IGNORE}="1"
SUBSYSTEMS=="tty", ATTRS{idVendor}=="2b04", ATTRS{idProduct}=="d006", MODE="0666", GROUP="users", ENV{ID_MM_DEVICE_IGNORE}="1"
SUBSYSTEMS=="usb", ATTRS{idVendor}=="2b04", ATTRS{idProduct}=="c006", MODE="0666", GROUP="users", ENV{ID_MM_DEVICE_IGNORE}="1"
SUBSYSTEMS=="tty", ATTRS{idVendor}=="2b04", ATTRS{idProduct}=="c006", MODE="0666", GROUP="users", ENV{ID_MM_DEVICE_IGNORE}="1"
Once connected on a USB port, if drivers have been correctly installed, the Particle Photon can be seen as Virtual Serial port and it is automatically recognized by Zerynth Studio and listed in the Device Management Toolbar as “Particle Photon DFU Mode” if the device is in DFU Mode, otherwise as “Particle Photon”.
To register and virtualize a Particle Photon, it is necessary to put the Photon in DFU Mode (Device Firmware Upgrade) as reported in the official Particle Photon Guide.
Note
On Windows machines it is necessary to install also the Photon DFU drivers for virtualizing the device.
The official Particle Core DFU driver and the related installation procedure are reported here but they also work for Particle Photon.
Follow these steps to register and virtualize a Particle Photon:
- Put the Photon in DFU Mode (Device Firmware Upgrade):
- Hold down BOTH buttons (reset and setup);
- Release only the reset button, while holding down the setup button;
- Wait for the LED to start flashing magenta, then yellow;
- Release the setup button; the device is now in DFU Mode (yellow blinking led);
- Select the Photon on the Device Management Toolbar;
- Register the device by clicking the “Z” button from the Zerynth Studio;
- Create a Virtual Machine for the device by clicking the “Z” button for the second time;
- Virtualize the device by clicking the “Z” button for the third time.
Note
During these operations the Photon device must be in DFU Mode. if the device returns in standard mode, it is necessary to put it in DFU Mode again.
After virtualization, the Particle Photon is ready to be programmed and the Zerynth scripts uploaded. Just Select the virtualized device from the “Device Management Toolbar” and click the dedicated “upload” button of Zerynth Studio and reset the device by pressing the Reset on-board button when asked.
Important
To exploit the Wi-Fi chip functionalities of the Particle Photon, the lib.broadcom.bcm43362 library must be installed and imported on the Zerynth script.
Firmware Over the Air update (FOTA)
The Firmware Over the Air feature allows to update the device firmware at runtime. Zerynth FOTA in the Particle Photon device is available for bytecode.
Flash Layout is shown in table below:
| Start address | Size | Content |
|---|---|---|
| 0x08020000 | 128Kb | VM Slot 0 |
| 0x08040000 | 384kb | Bytecode Slot 0 |
| 0x080A0000 | 384kb | Bytecode Slot 1 |
Important
OTA Record (small segment of memory where the current and desired state of the firmware is store) for the Particle Photon device is allocated in 16kb DCT1 (see Flash Layout) sector at 0x08006000 address.
Power Management and Secure Firmware
Power Management feature allows to optimize power consumption by putting the device in low consumption state.
Secure Firmware feature allows to detect and recover from malfunctions and, when supported, to protect the running firmware (e.g. disabling the external access to flash or assigning protected RAM memory to critical parts of the system).
Both these features are strongly platform dependent; more information at Power Management - STM32F section and Secure Firmware - STM32F section.